How to localize Until Then
Asset preparation
The first thing you need to localize the game is to unpack its assets.
Since this is a game made on the Godot Engine, I will use my Godot PCK Explorer.
(If the screenshots are too small, you can open them in a new tab)
- Using the
Godot PCK Explorer, openUntil Then.pck.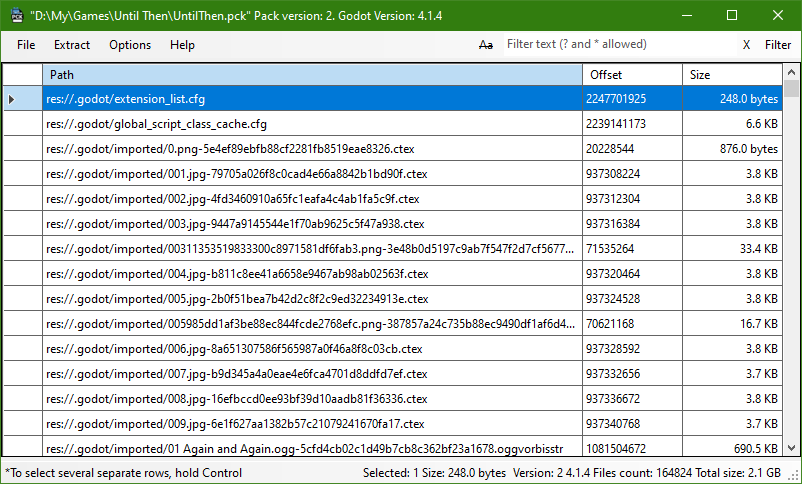
- Extract all files to a new folder, such as the
extractedfolder.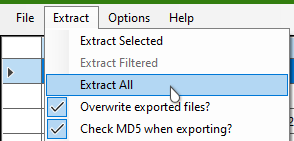
- Close the
PCKfile or theGodot PCK Exploreritself.
Opening inkcpp files
The Localization Editor supports opening one, several files, or entire folders, but I’ll only look at opening folders here.
- After opening the program, you will see a window like this:
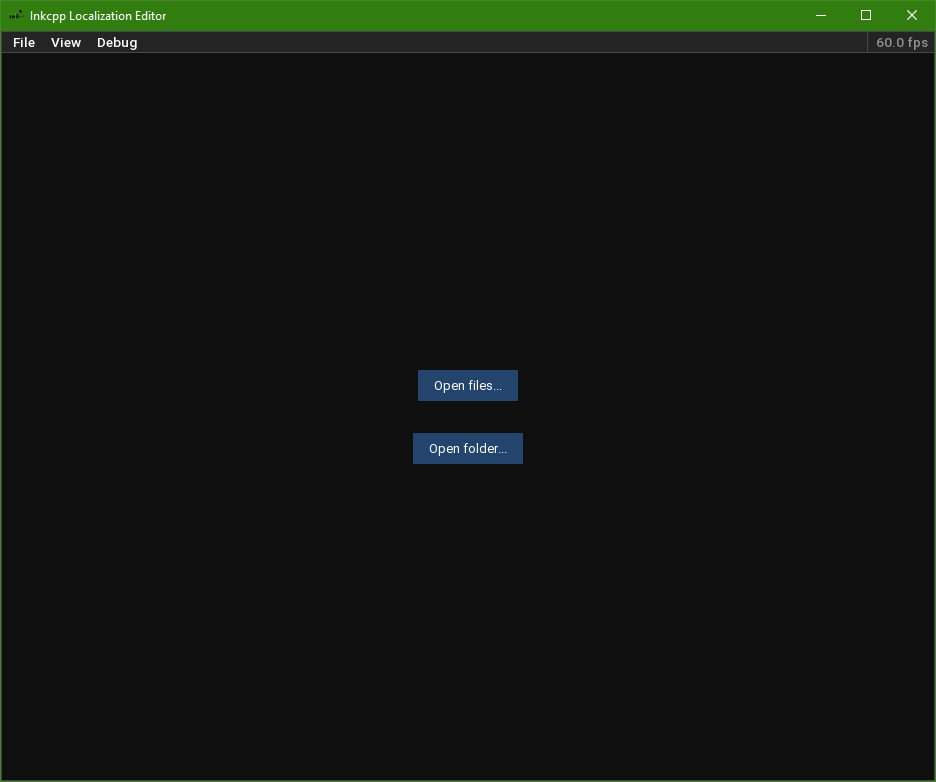
- Click
Open Folder...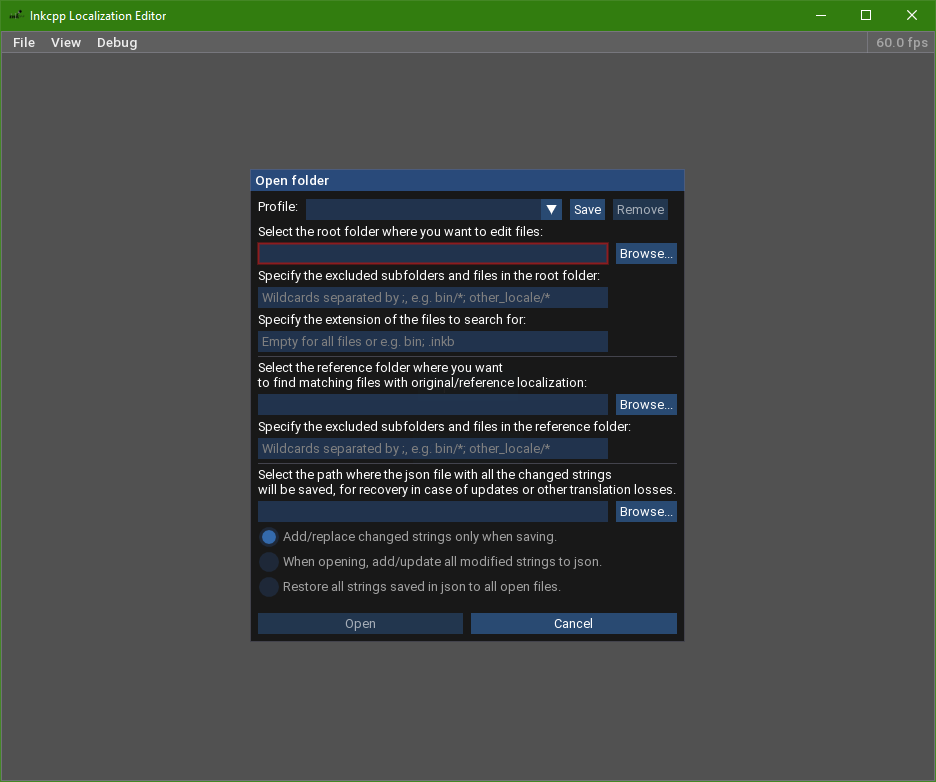
- The first section refers to the main folder that will be edited. Here you need to specify the root folder with inkcpp files. Then you can optionally specify one or more filters in wildcard format to exclude them from the search. You can also specify the file extension to search for.
- In the second section, you can specify the reference folder from which the original/referebce strings will be taken. For example, you will edit the German localization and refer to strings from the English localization. Otherwise, the next time the program is opened, it will only see the strings that have already been edited and will be referred to them. As in the first section, you can specify wildcard filters here.
- The last section is needed in order to save all the localized strings in a separate file and restore them later. For example, if a game update is released that affects localization, then you can easily restore most of the localization in new files using this section. Or you can translate the game using this file.
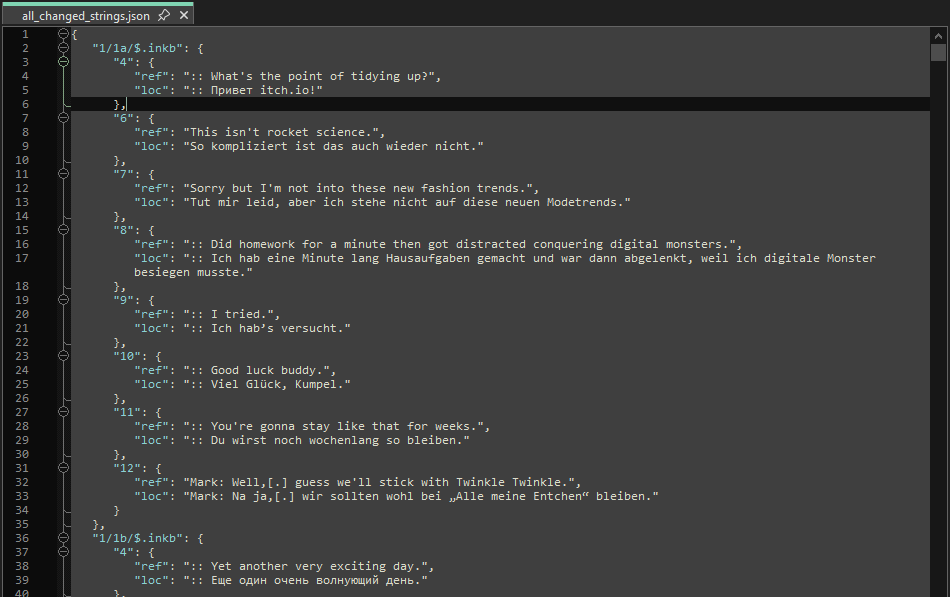
- Fill out this form at your choice or as shown in my screenshot. I will use German (
de) as an example. The story files are located in the folderextracted/assets/story, and the localization for them is inextracted/assets/story/locales.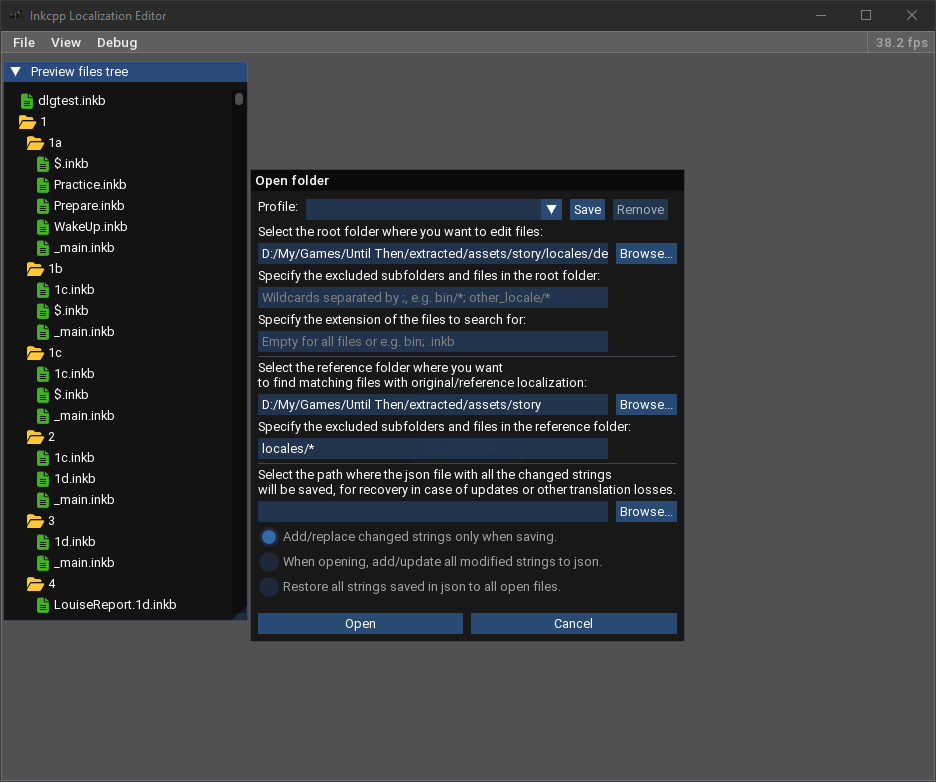
- Don’t forget to save your configured profile
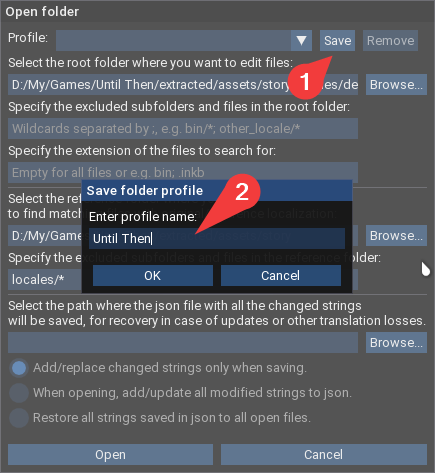
- Click
Opento load all found files.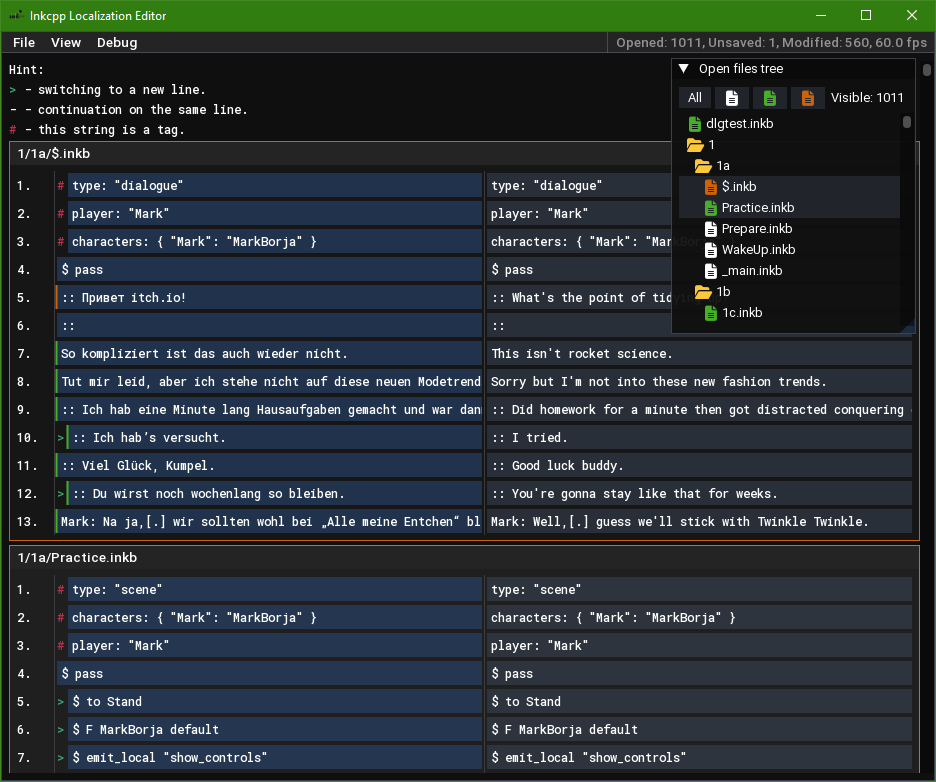
- If you have opened files with references, you will immediately notice that many file borders and strings will have a green color.
- The strings and borders of the files will also turn orange if you start editing them.
- Unmodified files will remain white.
- From this point on, you can start localization of the game. To save the result, use the
File-Save allmenu orCtrl + S. - Please note that these lines contain not only the text of the story, but also parts of scripts that are responsible for the game logic. Therefore, it is recommended to change only the lines that do not match the references (green highlight).
Updating game files
Now when you have some localized strings, the result needs to be verified or even released.
- First, rename the original
UntilThen.pckto something else, mine would beUntilThen OLD.pck. - Open the
Godot PCK Explorerand go to theFile-Pack or Embed Foldermenu.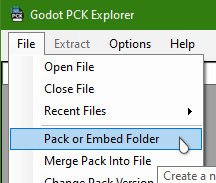
- Now you need to fill out all the necessary fields.
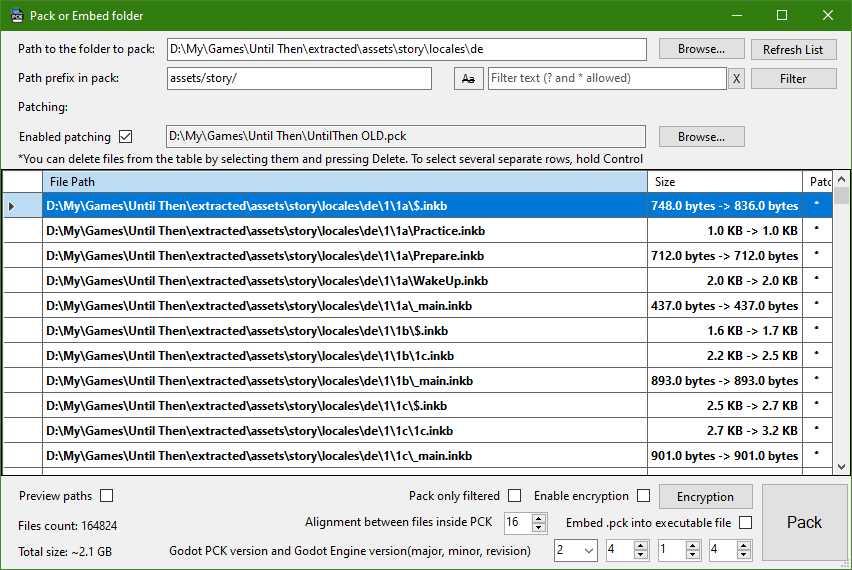
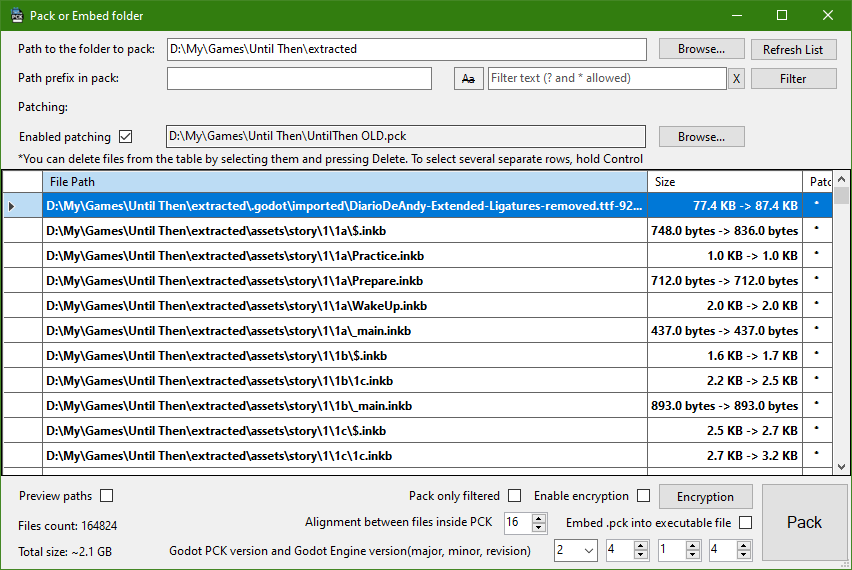
Preview paths- turn this checkbox off so that you don’t have to wait for long table updates.Path to the folder pack- is the folder where we edited the inkcpp files.Path prefix in pack- since we will be replacing some of the files inside the original PCK file, we need to specify the full path of our subfolder.
In my case, I specifiedassets/story/instead ofassets/store/locales/de/because I want other parts of the interface to remain in English, while the entire English text of the story would be replaced with our translated German files.
If the prefix is specified correctly, theSizecolumn will indicate the difference in the sizes of the original and new files.
- Check the box for
Enabled patchingand specify the path to the original PCK next to it. - And the last thing before patching is choosing a version. It should completely match the original version of the PCK file that we opened at the beginning. Here I have the original file open in the background and from it I moved
2 4 1 4to the appropriate fields.
- Now click on
Packand save the new PCK asUntilThen.pck.
- After that, you can check the result in the game. I changed the file
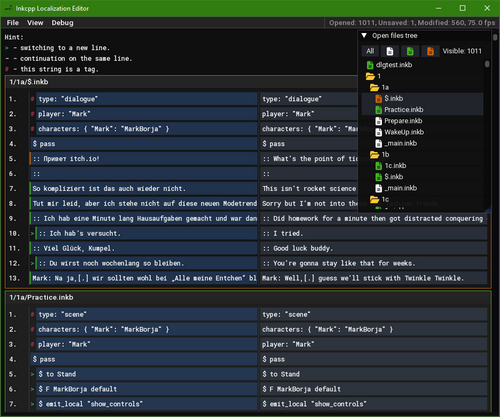
1/1b/$.inkb, so I started the very beginning of the second level.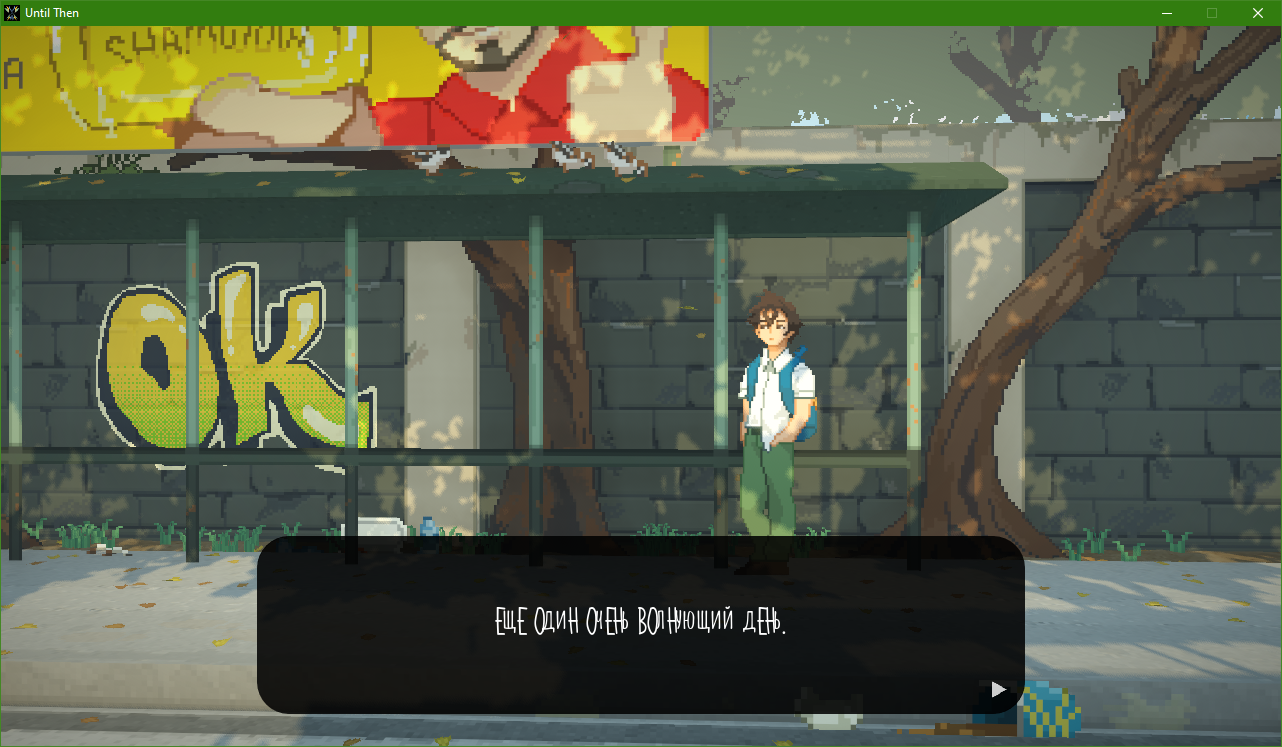
Replacing the font
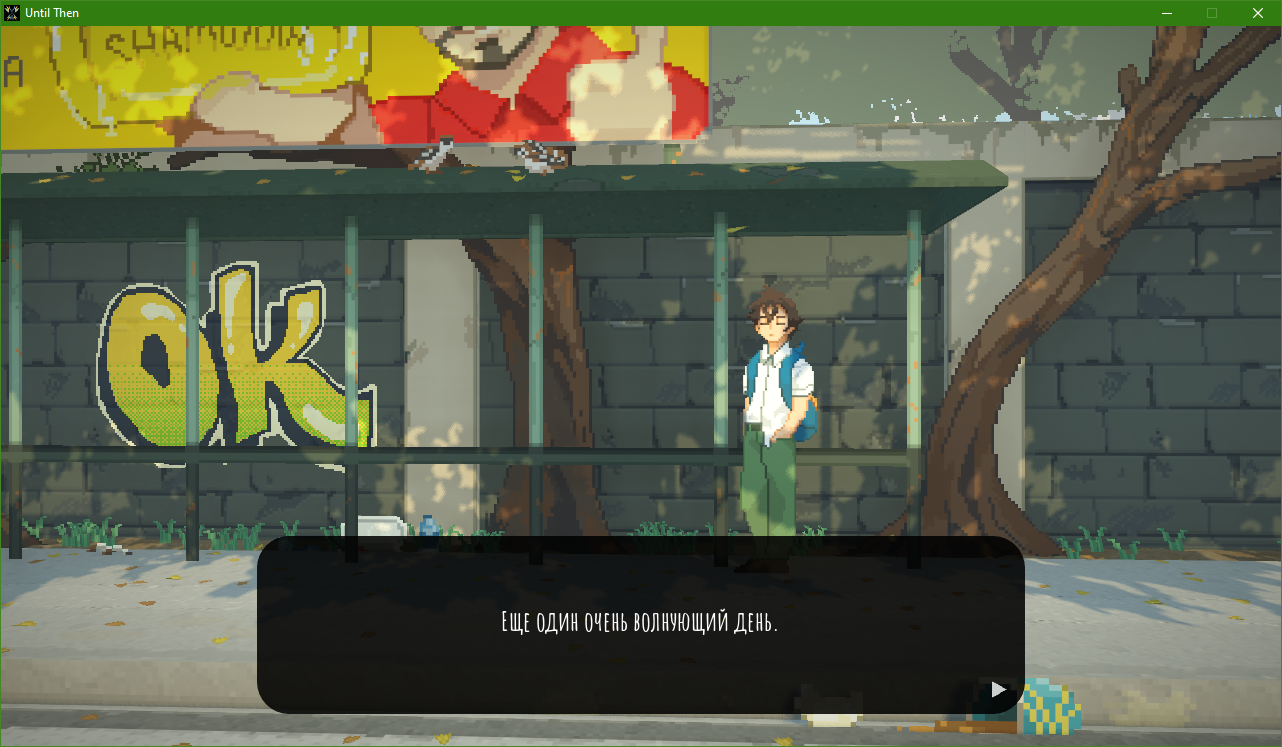
In the previous screenshot, I translated the line into Russian, but the font of the English version of the game does not display it correctly.
So using the Godot engine, I loaded all the files with the fontdata extension from the extracted/.godot/imported folder into it to visually find matching fonts. And I found that for dialog text in English is used font DiarioDeAndy-Extended-Ligatures-removed.ttf-92fbba2762da500e796374da97be64af.fontdata.
In one of the previous versions of the game, I also found that the folder extracted/fonts/locales already has ready-made fonts, including for the Russian language.

I checked several fonts from this folder (or rather their imported versions from the extracted/.godot/imported folder) and found that I need AmaticSC-Bold.ttf-d257a32d37f1c600471374fcd9b09dc0.fontdata. It is not available in the new version of the game, but you can download it via the link Russian font.
Now you just need to replace DiarioDeAndy-Extended-Ligatures-removed.ttf-92fbba2762da500e796374da97be64af.fontdata with the new font, for me it would be AmaticSC-Bold.ttf-d257a32d37f1c600471374fcd9b09dc0.fontdata.
Since the font files are located in the extracted/.godot/imported and the story files in the extracted/assets/story/locales/de folder, I’ll just delete everything unnecessary from the extracted folder and leave only the necessary files.
Also, to avoid using the prefix, I took the extracted/assets/story folder out of the extracted folder and named it english_story, and replaced the original extracted/assets/story folder with the extracted/assets/story/locales/de folder.
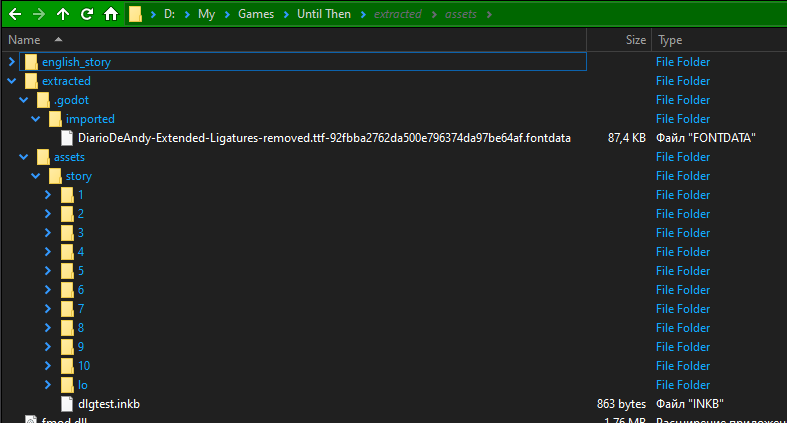
When packing, I’ll remove the prefix and specify extracted as the root folder.
The game now looks like this:
The resulting extracted folder can be used for distribution inside installers.
Don’t forget to update your Until Then profile in the Inkcpp Localization Editor if you do the same.
Also, if you want to use your font file, you can create an empty project in Godot Engine, put your .ttf font in it, and after importing, its fontdata version will also be in PROJECT_NAME/.godot/imported. Just copy this file instead of DiarioDeAndy-Extended-Ligatures-removed.ttf-92fbba2762da500e796374da97be64af.fontdata in the English version.
Automated patching
Godot PCK Explorer has native builds that can be embedded into installers. Check what console commands are available for it and configure scripts to work with it.
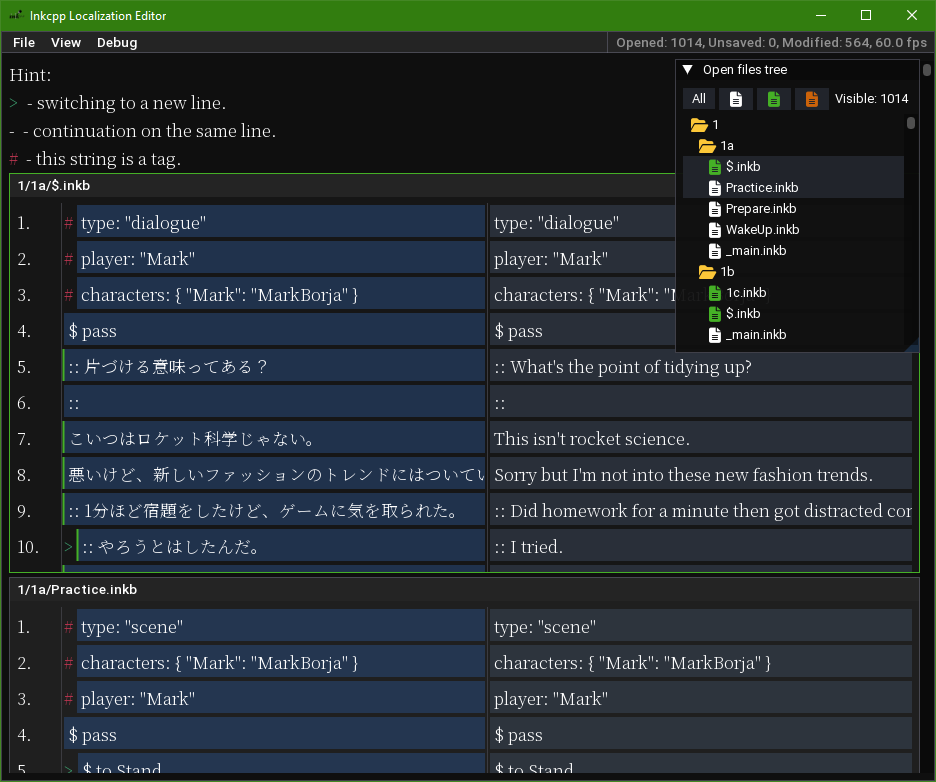
Broken characters in the editor
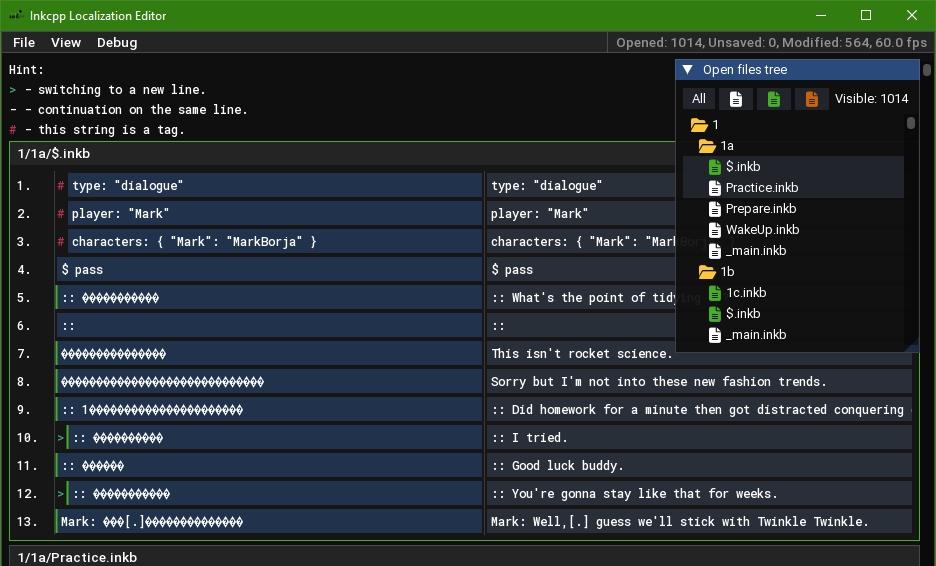
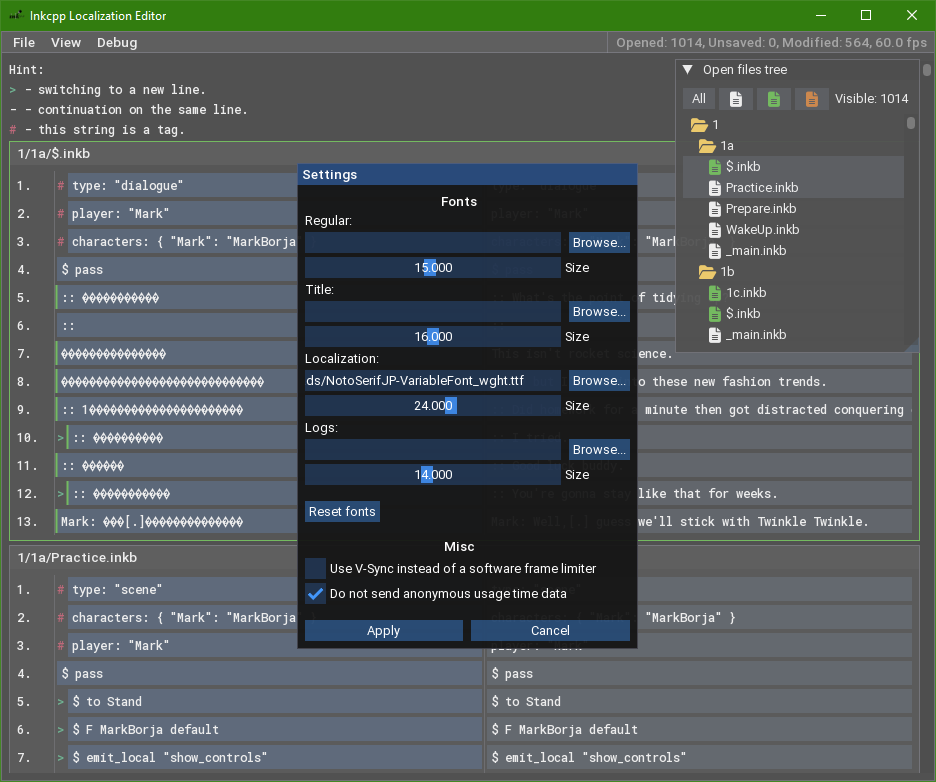
Go to the View - Settings menu and configure the font you are interested in.
Get Inkcpp Localization Editor
Inkcpp Localization Editor
A simple program for editing text in Inkcpp files.
| Status | Released |
| Category | Tool |
| Author | Dmitriy Salnikov |
| Tags | ink, inkcpp |

Comments
Log in with itch.io to leave a comment.
The only problem I've faced is locating where the files for things such as the menu and such are but your software have been extremely helpful and working flawlessly
The menu and something else are compressed and encrypted in the Godot engine localization format. I do not know if there are tools to localize these files.
But it is possible to translate the text of the social network and email, as they are stored in plain
json.Thanks, glad to help!
Hi regarding social network and email, is this a separate file from the story? or is there any clue which file it is? Thanks in advance.
Some of the compressed texts that are in the files are
assets/locales/text.*.translationand I do not know how to edit them.As well as social networks, email, and something else are located in
assets/databases/*.json.thanks man, just found it
What kind of data does telemetry.dmitriysalnikov.ru collect? I didn't see any privacy policy or anything like that.
The same as my
godot_debug_draw_3d: random user ID, random session ID, system language and region, editor language, OS, OS version, OS architecture, app version.For me, it just shows the number and duration of sessions.
code from godot_debug_draw_3d
But in fact, I still haven’t processed the data of this program in any way.
Oh yeah, how's your workflow? any automation at all or? I'm curious since i bought this tool, it's very good and easy to use, but i know this is gonna take a while if i do this one by one. also i notice some buttons are still in english, any suggestion on where is the file and is it also inkcpp that can be edited with this tool?
As far as I know, all the dialogues and scenes are
inkcpp. News and mail on a smartphone are likejsonor justplain textfiles. But the user interface was in theOptimizedTranslationformat from Godot (*.translationfiles), where the developers decided to save a few kilobytes, which is why it is impossible to restore the original key:value pairs (almost impossible, most likely they can be restored by iterating through all existing lines in the project).Also in the paid version, you can export all the strings to a
jsonfile and edit them using any text editor.I think at the time I wrote the guide, it was
1.3, which was released shortly before my program was released.